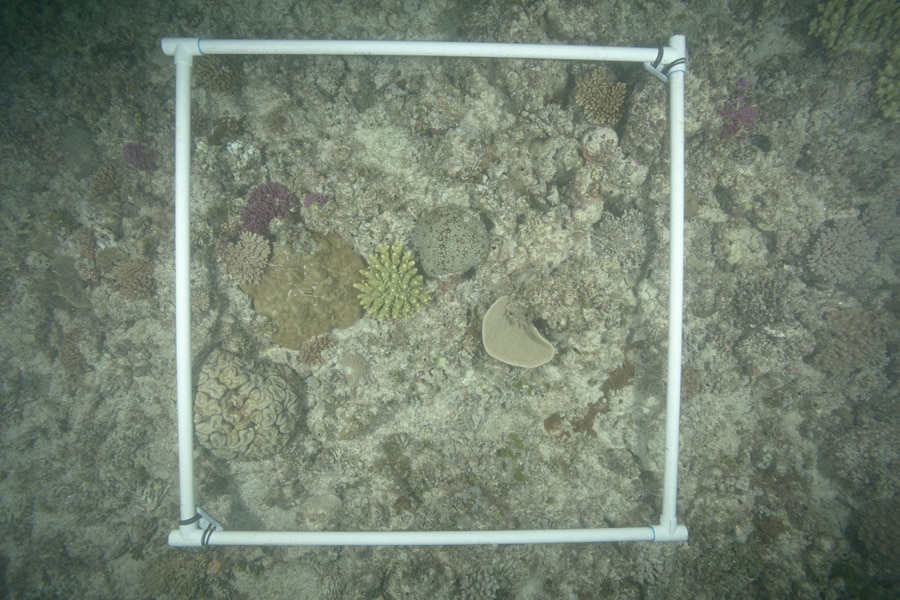
My role on the LOF expeditions in the Pacific has been underwater photography. In addition to being on the lookout for interesting or beautiful subjects for the Facebook photo gallery or to illustrate blog postings, my primary duty is to take a coral photo transect at each site we survey. My equipment consists of an underwater camera enclosed in a protective housing and connected to two strobes to provide light to restore color to the photos. Additionally, I take down a rather large (1m x 1m) PVC square called a “quadrat” used to frame and provide scale to my photos.
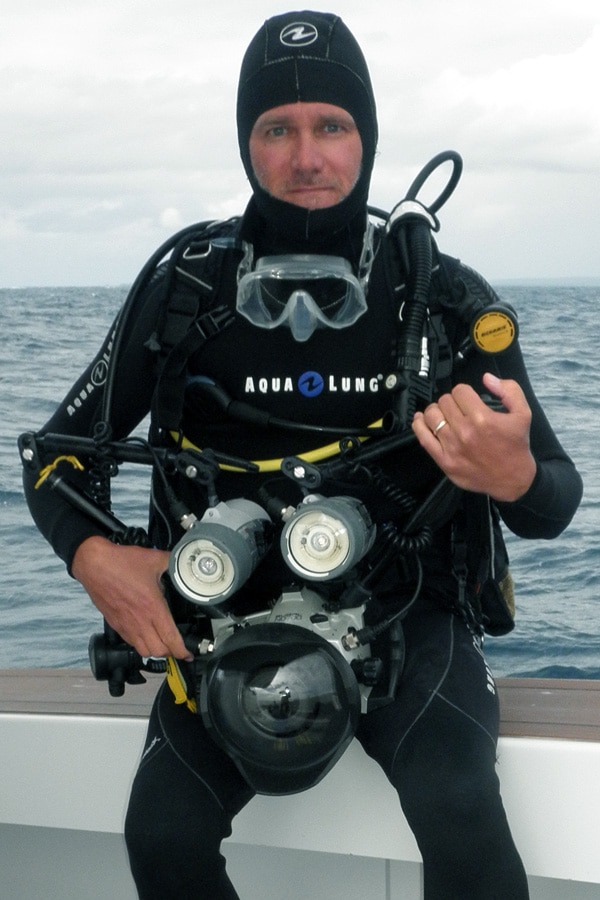
Ken Marks with his underwater camera and strobes before entering the water on a scientific dive to take a coral photo transect.
How the Quadrat & Underwater Camera Produce a Coral Photo Transect
At each site we survey, I search for coral reef habitat at various depths from 20m up to 5m (every 5m) and lay the PVC quadrat on the bottom so that I can hover above and photograph one square meter of reef. After taking the photograph I then lift one edge of the square and flip it over so that it rests on the adjacent section of the reef and photograph that square meter. The process is repeated ten times to record a 1m x 10m “photo transect” of the reef for later analysis. I’ve done this many times at many sites during each expedition resulting in thousands of photographs—making my quadrat one of the most photographed pieces of PVC that I know of.
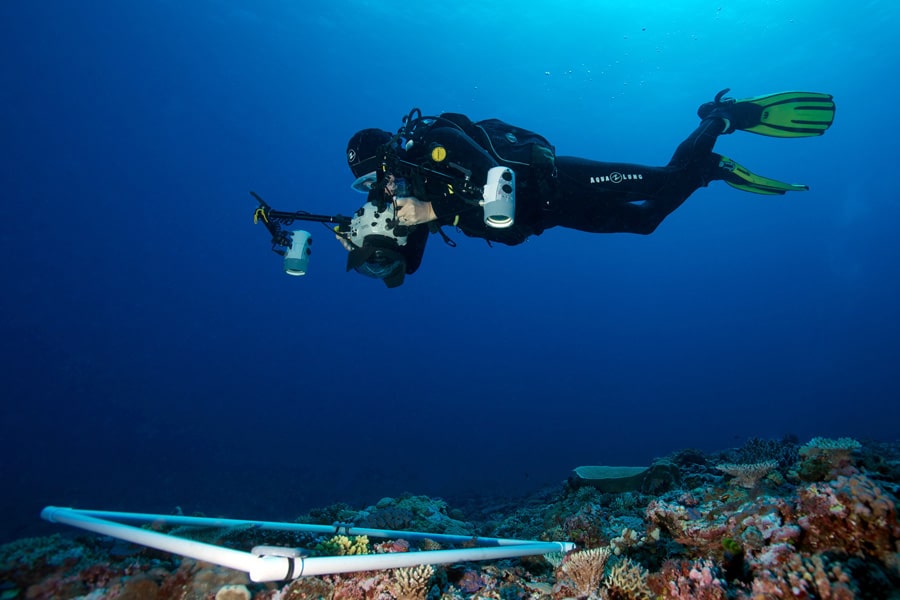
Ken Marks hovers above his white PVC quadrat to capture another coral photo transect.
Diving Conditions Can Make Underwater Photography Difficult
In ideal diving conditions I can finish a photo transect in as little as 6 minutes, however, we don’t always dive in conditions that could be considered ideal. Limited visibility due to plankton blooms or rough conditions that stir-up fine sediment can make diving more difficult and underwater photography quite a challenge. Luckily, even photos taken in murky, milky conditions can be adjusted with photo editing software to improve contrast and clarity so that the images may be easily analyzed.
Before image processing. This image was captured on a dive with turbid milky diving conditions. Note how washed out the image is. The corals and other seafloor components become harder to identify.

After processing to correct for lens distortion and balancing light levels the resulting image has much truer contrast and colors, and is rendered to a perfect one meter square.
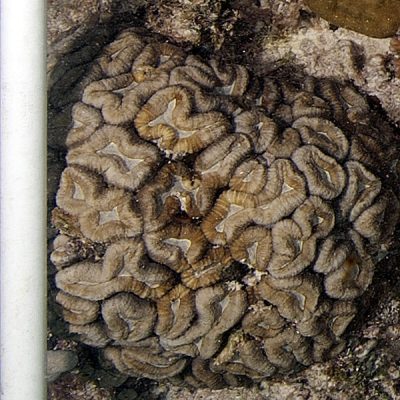
Zoom of lower left edge Photo 4. The images are captured and processed at high resolution. Small corals and seafloor components can be identified and measured with great accuracy.
While image processing software can help mitigate the effects of low visibility diving conditions, nothing but a lot of effort and a bit of patience can help when dealing with current or surge. When photographing on a reef when the current is running, the only option is to orient the photo transect so that you steadily work your way up-current kicking continuously just to maintain position over a fixed spot on the reef. It is even trickier to keep position over the quadrat when rough seas (especially long ocean swells) produce an effect underwater called “surge”. The rising and falling of big waves at the surface translates into a horizontal rocking motion at depth (even down to 20m) that can make both placing a quadrat as well as hovering above its center to frame a photo difficult at best. There are times when I will be pulled several meters away from my quadrat only to sail rapidly past it in the opposite direction with only a split second over the zone where I can take the photo. As these waves come in sets I will often have to wait-out a series of swells before conditions calm down to the point where I can resume capturing the photo transect.
Though occasionally difficult, my underwater photography work on the Living Oceans Foundations expeditions is always enjoyable and rewarding.
Photos: 1 – John Black, 2 – Joao Monteiro, 3-5 – Ken Marks